If you've resigned yourself to a couple of hours doing your nails then continue reading my friend :)
You will need:
Polishes in at least 4 different colours
Thin nail art brush (preferable- will make life easier, but not essential)
Dotting tool (preferable, and much easier, but again not essential)
Rhinestones (not essential)
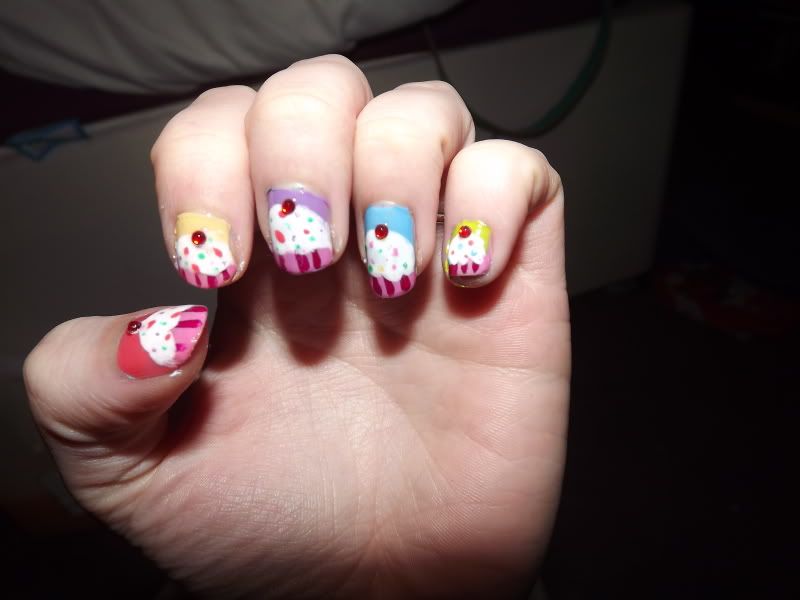
First things first- paint your nails in your chosen base colour. I originally painted all of my nails in one colour, but the fiance said different pastel colours would look better. I'm not sure :/
Either way, it's your choice so paint them how you want.
Leave to dry.
This is the problem with this sort of nail- it's not terribly difficult to do but it takes a long time between each coat since you need to wait for it to dry....
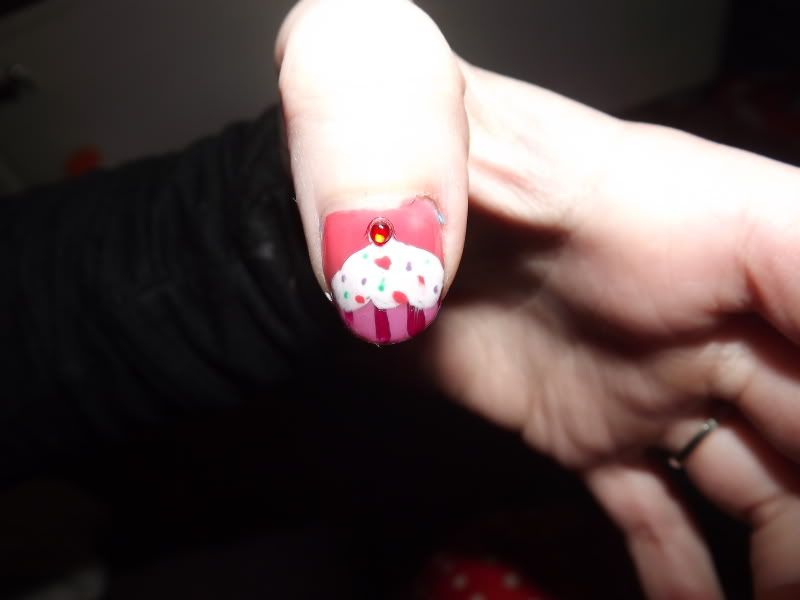
Ok, drying time's up- paint the tip of your nail and up to about 1/4 of the way in in your chosen cupcake case colour. Don't worry if the top isn't even or straight as we'll be covering it later.
Leave to dry.
Paint vertical stripes in your chosen cupcake case accent colour over the 'cupcake case' you just painted.
Leave to dry.
Grab your chosen icing (or frosting) colour and create a semi-circle over the top of the cupcake case. Fluff round the edges a little bit, you don't want it too perfect- it is icing after all!
Leave to dry.
Get your dotting tool and make random dots in the icing in whichever colours you please. This part is so fun!
If you're not using rhinestones then also create the 'cherry' with your dotting tool at this point.
Cover with a layer of top coat.
If you are using rhinestones this is the place to put them on, followed by at least one more layer of top coat.
And there you have it! Cute cupcake nails!
I'll definitely be doing these again some time- some day when I have some more patience!
No comments:
Post a Comment